Hom
Let’s Encrypt SSL, Nginx, MUP → Deployment (Meteor)
Nginx used for SSL setup
Let’s Encrypt free SSL certificate:
Use the instructions on this page to use OpenSSL to create your certificate signing request (CSR) and then to install your SSL certificate on your Nginx server. Restart Note: After you've installed your SSL/TLS certificate and configured the server to use it, you must restart your Nginx instance.
Let’s start by generating
Add a A Record in your domain’s DNS Settings
Add a A Record in your domain’s DNS Settings

Setting up Let’s Encrypt
- ssh into your server console and run following commands
$ wget https://dl.eff.org/certbot-auto
$ chmod a+x certbot-auto
$ ./certbot-auto certonly -d yourdomain.com --standalone
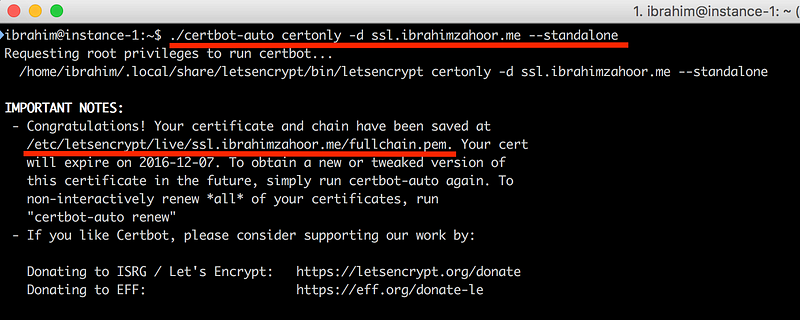
After successful execution of the last command you can see your Certificate & Key generated in /etc/letsencrypt/yourdomain.com
Setting up Nginx
- Let’s install nginx which will be our proxy server
$ sudo apt-get install nginx
- Use nano to create / edit your domain’s nginx settings:
$ sudo nano /etc/nginx/sites-enabled/yourdomain.com.conf
Below is the code that tells the server what to do. We listen to port 80 for domain.com and 301 redirect that to https://yourdomain.com, append the requested uri and listen on port 443 for our ssl set up.
Now check your nginx settings.
Run: $ sudo nginx -t
That should return
nginx: the configuration file /etc/nginx/nginx.conf syntax is ok
nginx: configuration file /etc/nginx/nginx.conf test is successful
If it returns an error, nginx will tell you which file and line number contains the error. Simply sudo nano to edit the file at the path name.
Now you have to restart nginx and you’ll be up and running.
$ sudo service nginx restart
Setting up MUP
Installing mup
$ npm install -g mup
You can create a directory .deploy in your project and initialize MUP
$ mkdir .deploy
$ mup init
After mup init following file will be generated and then you can edit it according to your needs.
yourdomain.com.conf file
server {
   ...
   location {
      ...
      proxy_pass http://localhost:3000;
      ...
   }
   ...
}
mup.js
meteor {
   ...
   env {
      ...
      PORT: 3000,
      ROOT_URL: http://localhost
      ...
   }
   ...
}
Keep in mind we will have to use the same ROOT_URL & PORT in MUP env and yourdomain.com.conf file
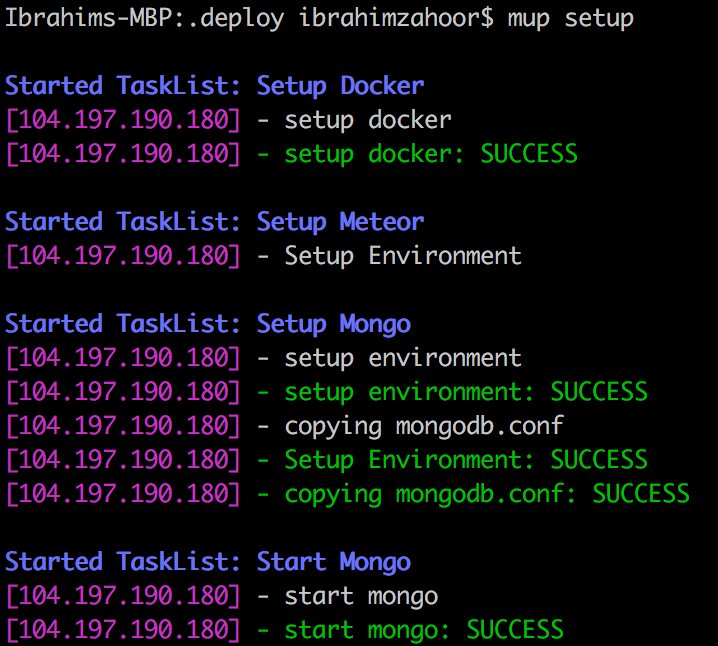
$ mup setup
$ mup deploy
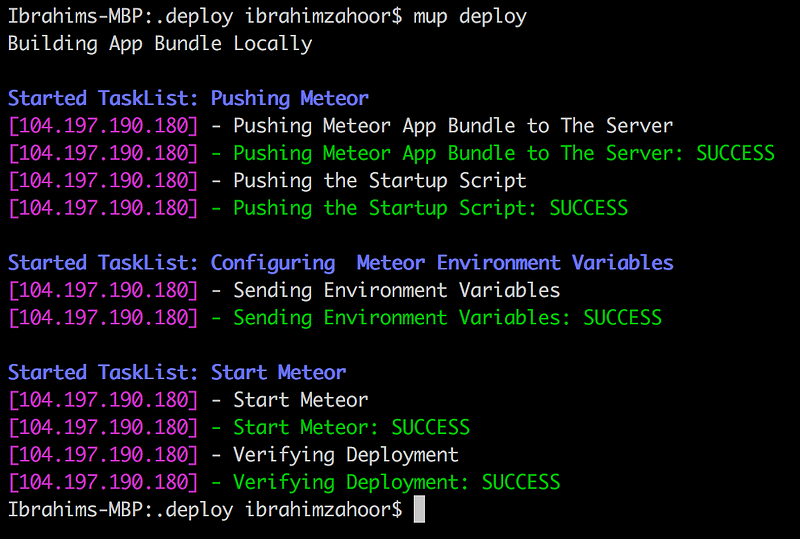
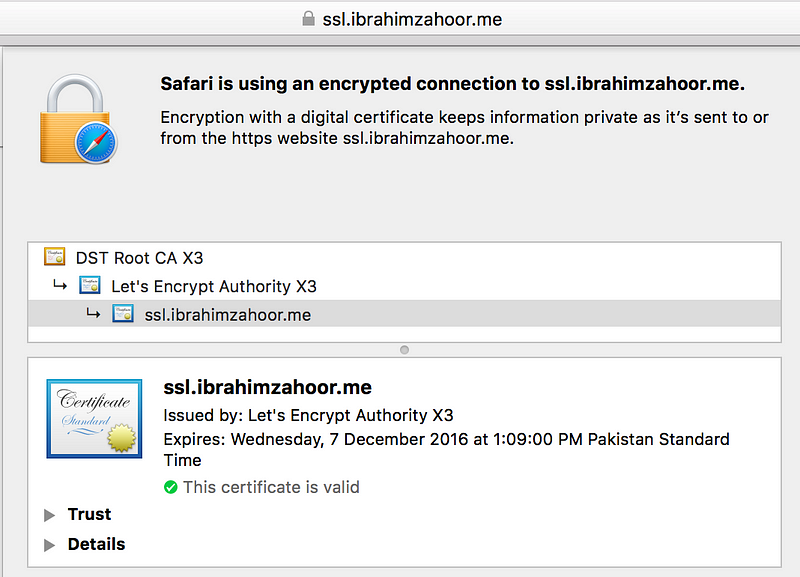
Your app is deployed and you can access it on https://yourdomain.com.
References:
Never miss a story from Qbatch, when you sign up for Medium. Learn more
- Get link
- X
- Other Apps
- Get link
- X
- Other Apps
Comments
Post a Comment